Tips for Painting Walls: A Guide from XL Painting
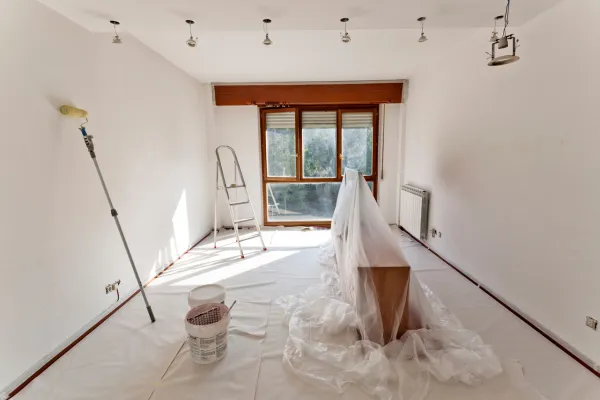
Painting your walls is one of the most cost-effective ways to refresh and personalize your space. But if you want professional-looking results, a bit of planning and prep work can go a long way. At XL Painting, we’ve painted everything from single rooms to large commercial properties across Colorado, and we know that success starts before the first coat of paint is even applied.
Here are our top tips for painting walls like a pro—whether you’re tackling a DIY project or planning to hire professionals like us.
1. Start with Proper Wall and Surface Prep
Painting over dust, grease, or old flaking paint will lead to poor adhesion and an uneven finish. Here’s how to prep your walls:
Clean the Walls: Use mild soap and water or a degreaser for kitchens. Wipe down walls and let them dry completely.
Repair Damage: Fill holes, cracks, or dents with spackling compound. Sand smooth once dry.
Sand Glossy Surfaces: If the wall has a sheen (like semi-gloss or gloss), lightly sand it to help the new paint stick.
Remove Loose Paint: Scrape off any peeling or flaking paint, especially on older walls.
Tape and Cover: Use painter’s tape to protect baseboards, outlets, and trim. Lay down drop cloths to protect your floors and furniture.
2. Use the Right Tools for the Job
Quality tools make a big difference in your results and ease of application. Here's what you'll need:
Paint Rollers: Choose a ⅜" nap for smooth walls or ½" nap for textured surfaces.
Angled Brushes: Great for cutting in edges and corners with precision.
Paint Tray and Liners: Easy for loading paint and cleanup.
Extension Poles: Helpful for reaching high walls and ceilings without a ladder.
Sandpaper and Putty Knife: For smoothing walls and applying spackle.
Painter’s Tape and Drop Cloths: To keep everything clean and neat.
3. Don’t Skip the Primer
Primer is essential for a long-lasting, even finish—especially on certain surfaces. Here’s when you need it:
New Drywall: Always needs primer to seal the surface.
Stained or Water-Damaged Areas: Use a stain-blocking primer.
Drastic Color Changes: If you’re painting over a dark color, primer helps prevent bleed-through.
Glossy Surfaces: Primer helps paint adhere better to slick finishes like enamel or oil-based paints.
A tinted primer can also help reduce the number of paint coats needed when going from a dark to light color (or vice versa).
4. Paint with the Right Strokes
Your painting technique affects how smooth and professional the final result looks.
Cut In First: Use a brush to paint a 2–3 inch border around ceilings, trim, and corners before rolling.
Roll in a “W” Pattern: Load your roller and apply paint in a “W” shape, then fill it in without lifting the roller. This spreads paint evenly.
Don’t Overwork the Paint: Once it’s applied, avoid excessive brushing or rolling, which can cause streaks or lift the paint.
Maintain a Wet Edge: This prevents visible lines or lap marks between sections.
For the smoothest finish, apply two coats and allow proper drying time between them.
5. Consider the Surface Type
Different surfaces require different approaches:
Textured Walls: Use a thicker nap roller and press firmly to reach crevices.
Plaster: Often requires an oil-based primer for proper bonding.
Concrete or Masonry: Needs special masonry primer and paint to handle moisture.
Previously Painted Walls: If in good condition, a light sanding and cleaning might be all you need before repainting.
Wrap-Up: Let the Experts at XL Painting Help
Painting might seem simple, but the difference between an amateur job and a professional finish is all in the prep and technique. If you'd rather skip the hassle and ensure flawless results, XL Painting is here to help. We serve homeowners and businesses across Colorado with top-quality interior and exterior painting services—always clean, efficient, and tailored to your needs.
Ready to refresh your space? Contact XL Painting today for a free estimate.